Showing posts with label CAS. Show all posts

Wednesday, January 20, 2016

Happy Hour - BGC-71

Hi everyone !
Without further delay
Here are the winners for BGC#71
Thanks for sharing all your amazing entries

Our Top 3 are - 

Mary's Crafty Moments (Greece)
With this spectacular CAS Layout ! Such a beautiful composition of colors !

Pooja 
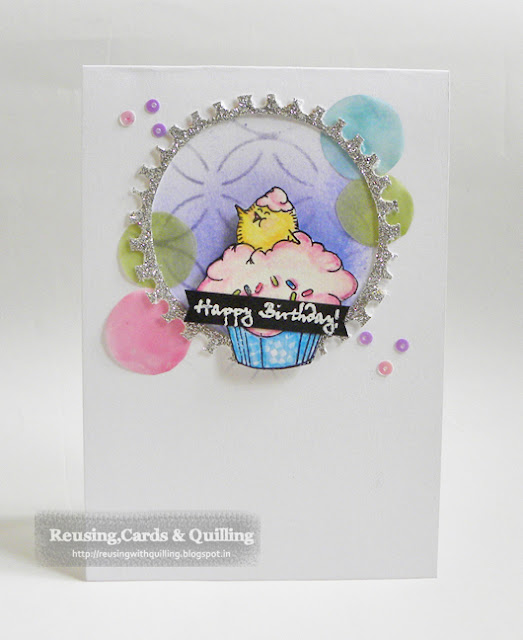
With this colorful card ! :)

Catchy Design 2 
With this well made card ! Such a stunner !

And the winners are  - 

Prize 1 


Congratulations Tanvi you have won a 500 INR Gift Voucher from  Kraft zone
http://www.kraftzone.in/


Prize - 2  (Random draw)


WOW ! Twice lucky in one challenge!!!
Congratulations Catchy Design you have won a 500 INR Gift Voucher from Rainbow Craftykari

 Rainbow Craftykari


Winners please take your respective badges from the side bar.
Also prize winners can email lightbox.c@gmail.com asap to claim their GV's ! 
 Subject of email being - Winner BGC#71 - Prize 1 or Prize 2 what ever applies !

Thats another awesome challenge done !
Thanks for playing with us we enjoyed going through each of your entries !


Tuesday, September 22, 2015

BGC#71 - CAS cards or LO's

Hello everyone !! 
I would really like to thank everyone for joining us in last month's challenge with so many entries ! 
I assure you the results will be announced real soon!!

So this month we have another little challenge for you !
Yes we are going "Clean and Simple "
So join us with your CAS cards or Layouts all along this month ! :) 

Please welcome our sponsors -

Prize 1  is being sponsored by the generous sponsor Kraft zone

 http://www.kraftzone.in/ 
Which is this lovely pear die from sizzix ! 
 

Prize 2 is a Gift Vocher of 500 INR  from Rainbow Craftykari
 
  Rainbow Craftykari
 Isnt that lovely ?
So with all this information lets talk about what i came up with.
I decided to go for a Layout this time.
I will also show you how i made it. 

Lets get started ! 

 These are some of the basic things I will be using for this LO 
Of course I will be adding more to the list as we proceed. 

 I am using a 10 x 10 cardstock for the base of the LO, I have this specific size because i plan to fit it under a frame later. (Which i am yet to buy! But oh well ! there is nothing like a bit of pre planning :) 

So the first step was to add some yellow mist ! I have used a generous amount. 
Dont worry about the puckering in the base. It will ease soon. 
I am using Heidi Swapp Color Shine mist Butter- its got some gold shimmer with the lovely color. 

 I have then added some splatter of Amethyst as well. I did plan on using Lindy's Stamp Gang Turcoise but i finally went with Heidie Swapp Amethyst mist.
 Next I added Cheerylynn designs-french-pastry-doily die cut. 
I kept it white for the Clean look. 
 Next I added some white paper twine which i bought locally. 
I just created loops and stuck it down on the side over the doily. 

 I then cut up some Flowers and stuck them as shown above. 
 Now its time to add the photo. 
I just placed my photo on top of the flowers such as to cover the flowers slightly. 

My next and final step was to add some stamping !
I used black pigment ink with Prima finnabair-Dream on cling stamp.

 
And my CAS layout is ready !
The key to nailing a CAS layout would be lots of white spaces , clean lines or shapes with use of less elements !  This was definitly a make it work moment for me because i am not a CAS girl at all !
But looking at this I realise its such a fun jonear to work in too! 

So i hope I have inspired you enough to join us in this CAS challenge ! 
You can link up your projects HERE


Tuesday, September 8, 2015

BGC#71 CAS Cards or Layouts

Hello, my dear followers!
It's great to be here again after longer summer break. What's more, I've seen your fantastic dimensional project and I have to say, that we have very difficult task now! You are so talented and creative!
I hope to see  wonderful projects this month, too. I know, that for some of you CAS isn't so easy to make, but sometimes it's worth to try. And if you try, show us effects!
But before you enter your card or layout, remember about these simple rules:
  • Make a clean and simple card or a layout ! 
  • Your project must be new and dated after the challenge date.
  • Link back to our challenge.

Deadline to enter -  30th September 2015 until 11:55 PM IST .

And wonderful prizes are waiting for you!

Prize 1  is being sponsored by the generous sponsor Kraft zone

                                                  http://www.kraftzone.in/

Prize 2 is a Gift Vocher of 500 INR  from Rainbow Craftykari

                                                      Rainbow Craftykari

Summer is over, but I have for you a card in summer colors. Also inside you will find paper with colorful stripes.


I finished my card with three enamel dots. They are perfect for CAS cards.


My card isn't flat, I used 3d foam tape to stick the white & black panel with "hello" to a piece of patterned paper.

Feel free to join us this month! Please enter your project(s) HERE!
Hugs,
Aneta

Sunday, May 10, 2015

BGC#68 - Make your own embelishments

Hello everyone !! 
Welcome back to another lovely challenge set by the design team here at the BGC blog :) 
We loved your projects for the spring green challenge ! 

Thank you for playing along !
let s check out the rules 


Challenge Guidelines : 

  • Use your handmade embellishments on any paper crafted project or just make an embellishment on its own. 
  • Make sure you explain in your post which embellishments are handmade.
  • Tutorials are welcome but not needed to win. 
  • Your project must be new and dated after the challenge date. 
  • Link back to our challenge . 

                                                   Our generous sponsors for this month are
                                                              
                                                                        Prize 1


A Colorbox mixed Media Inkpad 

Hot of the press flower stamp
Bella rouge note cards
                                           
                                                                       Prize 2


The Craft shop is generously donating a GV
for our winner ! :) 


So here is my card for the challenge.
I'm afraid this was a quick fix on the go as i was pretty busy to do something elaborate ! 
Nonetheless its something i think i liked in the end !

 For this challenge i wanted to focus purely on the handmade embellishments so i went for these simple puffy hearts ! 
They are an absolute delight to make :) 
 I have a doily folding in from both sides of my pattern paper.
And i have used water color letters by HS and embossed it with Gold embossing powder for it to pop out ! Love how it looks 
So thats about it from me today !

Do join us with your embellishments HERE 

Sunday, November 16, 2014

BGC#63 - Monochromatic !

Hello everyone !!
Its PJ here ! Its time for another challenge this November :) 
So our DT member Aneta challenged us this fortnight to create something Monochromatic ! 
So we present to you our 63rd challenge 

Challenge guidelines :  (PLEASE READ CAREFULLY)
  • Make a project using shades of only one color (any color - your choice). If you are not using shades just go for one single color against the neutrals.
  • Neutrals like white and black will be allowed but in minimum amount.
  • If you are using a stamped image make sure you stay in the color scheme u picked, but you are free to use skin and hair shades for coloring human images.
  • Here is the color wheel for your reference if you are using shades !

  •  Link back to our challenge to be eligible for the prize
  •  deadline to enter - 30th Nov 2014 until 11:55 PM


Here is what i made ! 
 As you can see i went with the blue green family of colors !
Teal is one of my fav colors and it always works with the neutrals !

 I have been trying to get my hands on one of those feather dies but somehow my local store is always out of stock !! so i just hand cut these ones ! Not a big deal but i am definitely gonna get those feather dies. 
They are so in trend at the moment !
 I have used some frantage embossing enamel on the feathers to give them that dreamy look. 
And added some twine made into a bow with some pearls to finish the look. 


For the background i just went with one of the lovely ombre paper from crate paper's  flea market collection.
Over which i did some ink splatter in black and teal (lindy's Stamp gang mists) 
  So thats about it on how i did this card !
Please do enter this challenge :) 

the winner will receive a lovely prize from
https://www.facebook.com/CREATIVITA14?pnref=story

So let the entries begin ! 


Thursday, July 3, 2014

BGC#54 - Back pack boxes with PJ

Hey guys !
Its PJ again ! Did u hear about our latest challenge ? 
Oh well ! Jovi kick started the challenge with an amazing quilled clock !
And i decided to do something different this time .
So rather than a card or a LO i decided to go for some 
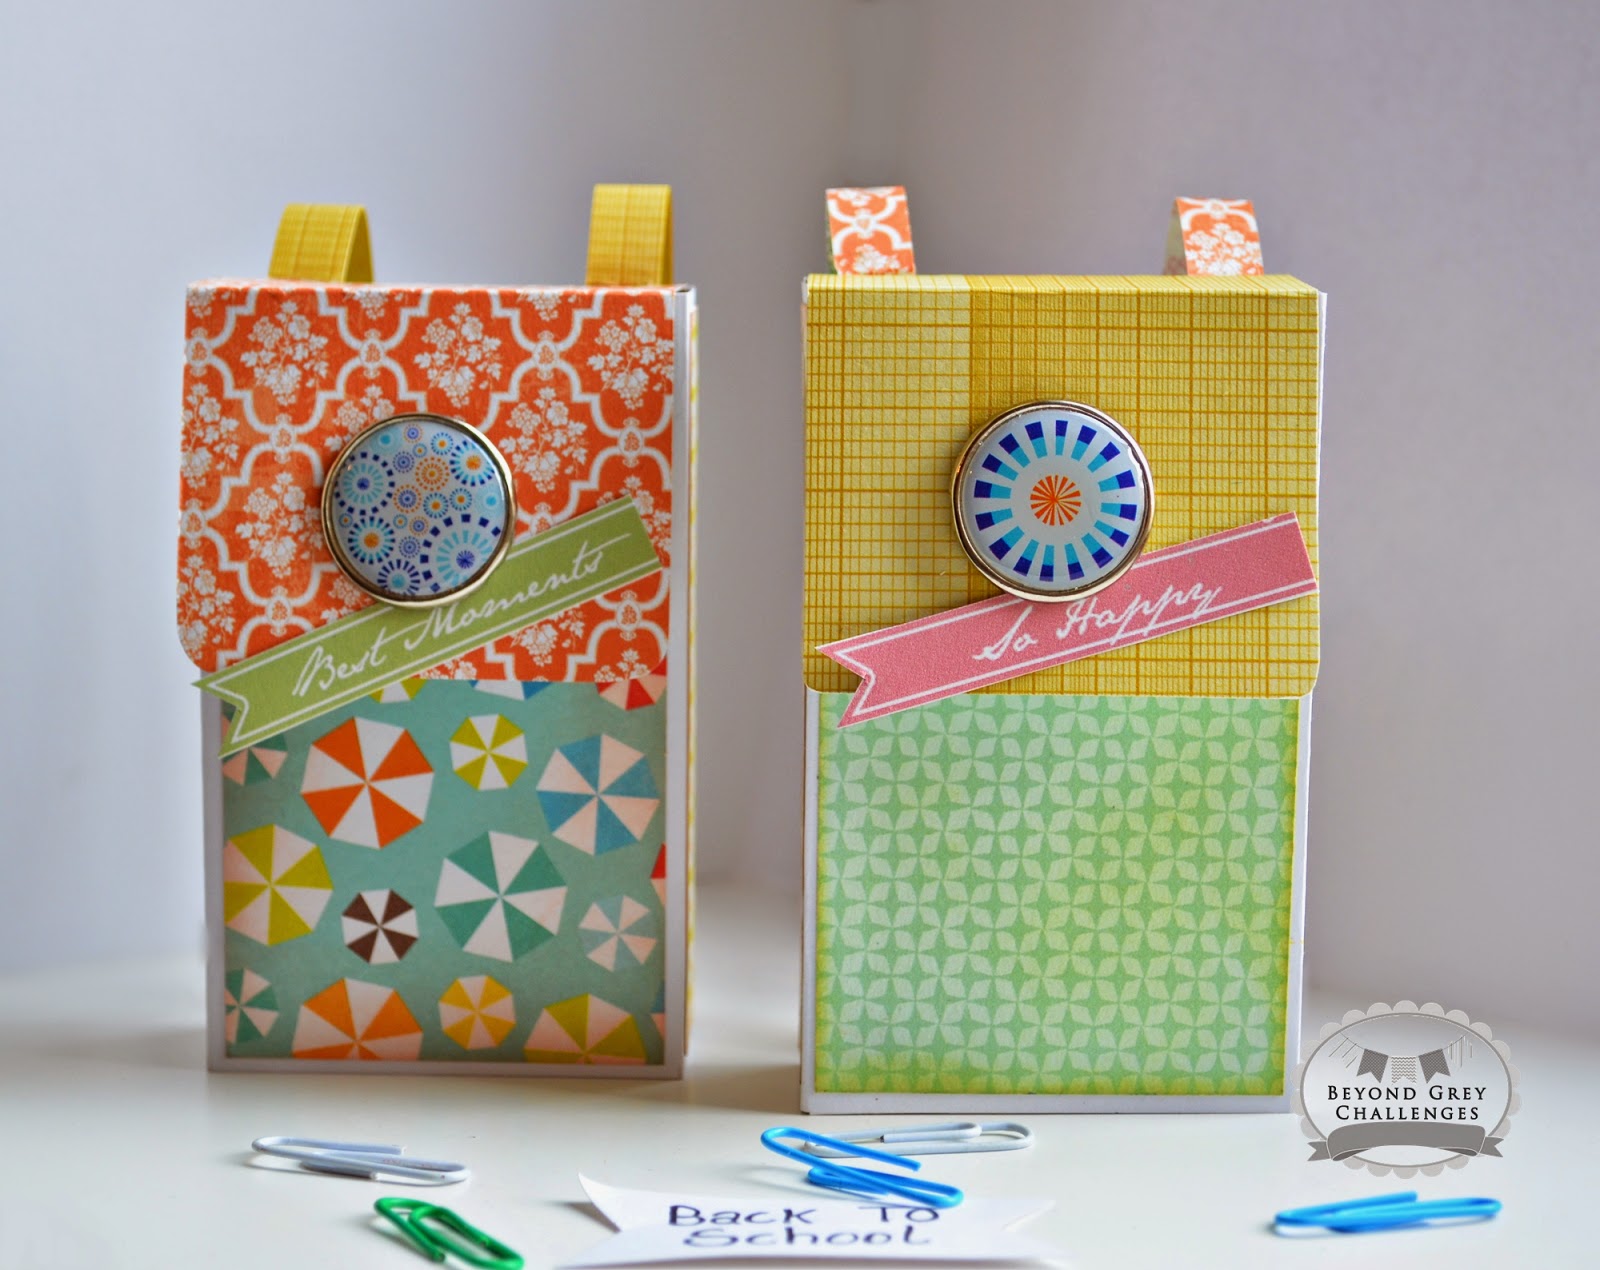
Back Pack Treat Boxes ! 

And i have a tute to go with that ! 
Here is what i made 

I wanted to go with the theme "Back To School " 
So i thought of making these treat boxes to hold candy for kids ! 

Here is how i made them. 

  •  Start with an A4 card stock. Keep it on your scoring tool like its shown in the above picture.
  • Score at 1" , 3.5", 4.5" , 7" and cut at 7 & 1/4th . I have scored the 7 & 1/4th line to show better where to cut. you can just use a pencil to mark that line and trim it.
  • Once you are done with the above step you will have a big piece of paper with 4 score lines. 
  • Cut this paper in half horizontally so you should have 2 final pieces as shown below.


  •  These two pieces will become one box each. 


  •  Fold on all the scored lines with your bone folder.


  •  Once one your boxes should look something like they are in the above pictures.


  •  Before you stick the box make sure you decorate it. So any pattern paper that needs to be stuck or any dry or heat embossing that you need to do , is to be done now. 
  • I decided to go with some fun and colourful papers from Echo park - Splash. 


  •  Once you have stuck your papers , take another piece of the dimensions as given above. score and cut for making the base of your box. This can be included in the first step itself by modifying the template of the box but that would have wasted a lot of my paper so, i prefer to do it this way.


  •  At this stage you should have 2 pieces like this. 


  •  Now comes the fun part ! putting it all together. 
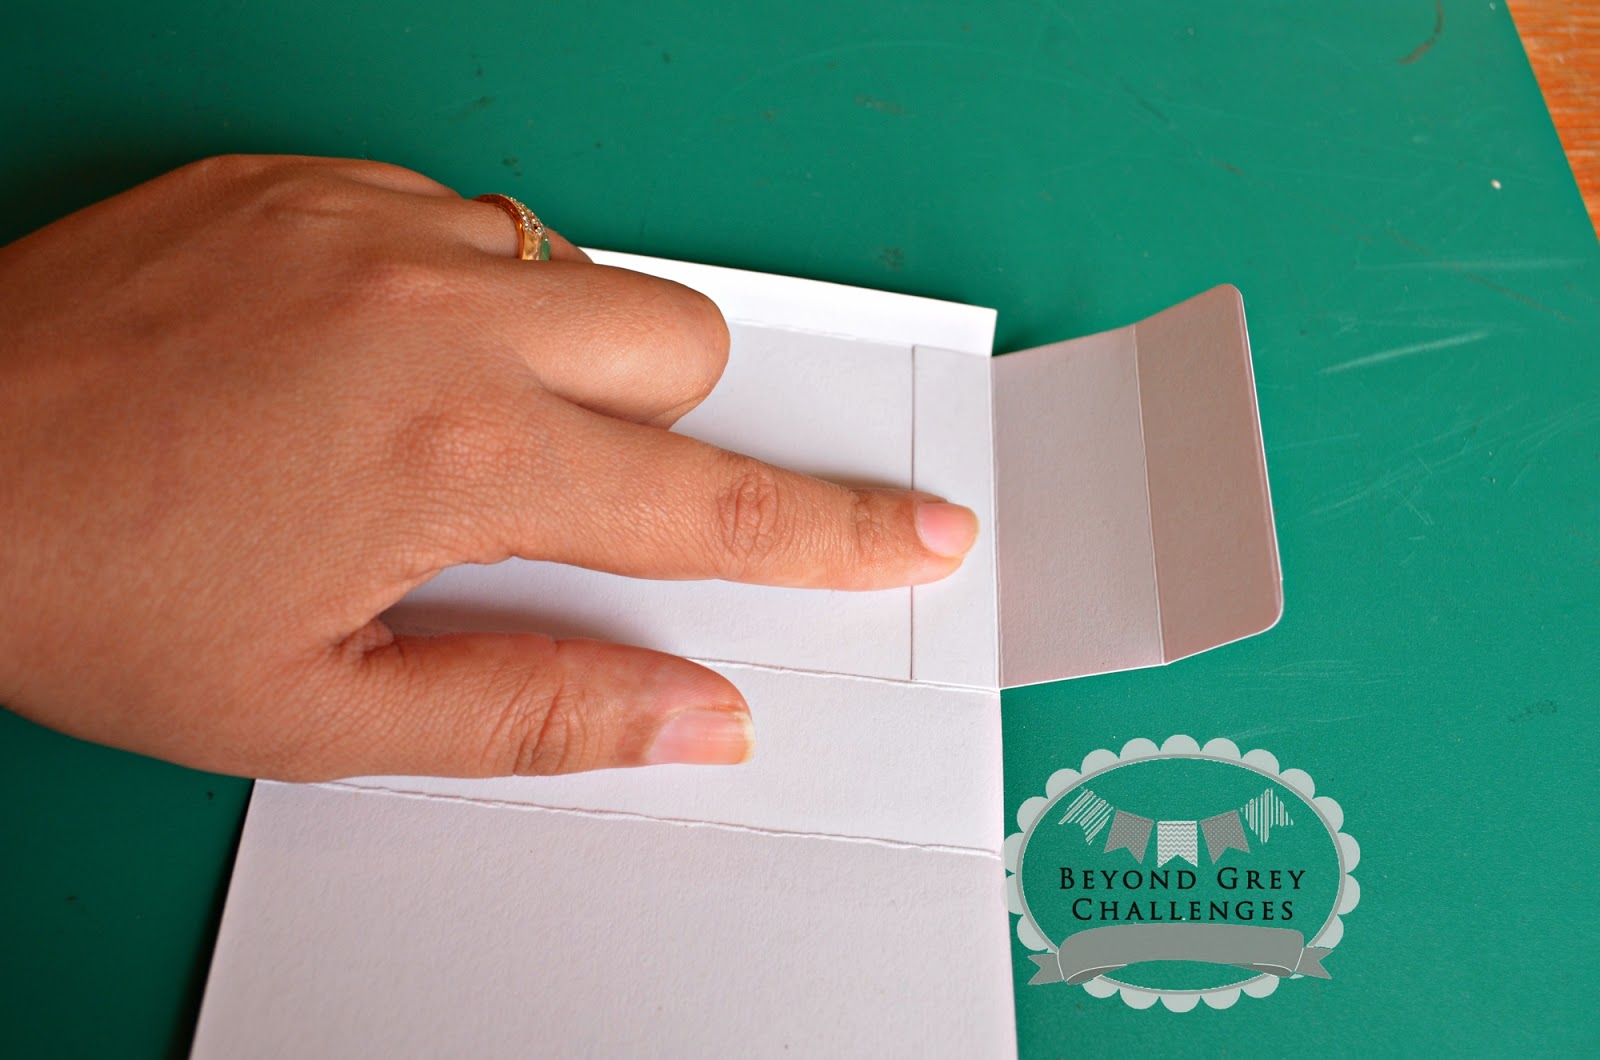
  • REMEMBER to glue the 0.5" part of the flap and stick it on the inside of the box at the very end where we have very small scored panel. see the above picture to understand better. 

  •  Now turn over your box to the right side and glue up the small panel in white. 
  • This will give your box the rectangular frame.

  • This is how it should look at this stage.


  •  Now just glue over the bottom flap as shown above and secure the bottom of your box shut. 
  • You can keep this not glued so your box can be opened from both sides. But i wanted to fill it with some heavy candy and i didn't want to box to open up from the bottom .


  •  So that is how my box looks now after the bottom is sealed shut. 

  • Finally just glue 2 thin pieces of design paper to the back of the back pack so this will be the straps for the bag. 
  • Also cut a piece of design paper that is 6.75" long and about 2.5" wide. 
  • Score this paper at 5" & 6" as shown above . 
  • Now glue the right side of the pattern paper on the smallest panel and stick it to the inside of the box such that it should make a nice top flap as shown in the final pictures. 
  • Notice the top flaps below. 

  •  And finally embellish the top of your box any way you like. 
  • I added a big epoxy brad on the upper flap for the box and then added my sentiment banners. 

This is how the back should look. 

Hope that you liked my tutorial on Back pack boxes . 
Do let me know how u liked it (or not !) 
So i am concluding this in hopes that you will make something Kidsy ! 
for our latest challenge !
Link ur entries HERE

Thanks !! 


Popular Posts