Showing posts with label gift. Show all posts

Thursday, July 3, 2014

BGC#54 - Back pack boxes with PJ

Hey guys !
Its PJ again ! Did u hear about our latest challenge ? 
Oh well ! Jovi kick started the challenge with an amazing quilled clock !
And i decided to do something different this time .
So rather than a card or a LO i decided to go for some 
Back Pack Treat Boxes ! 

And i have a tute to go with that ! 
Here is what i made 
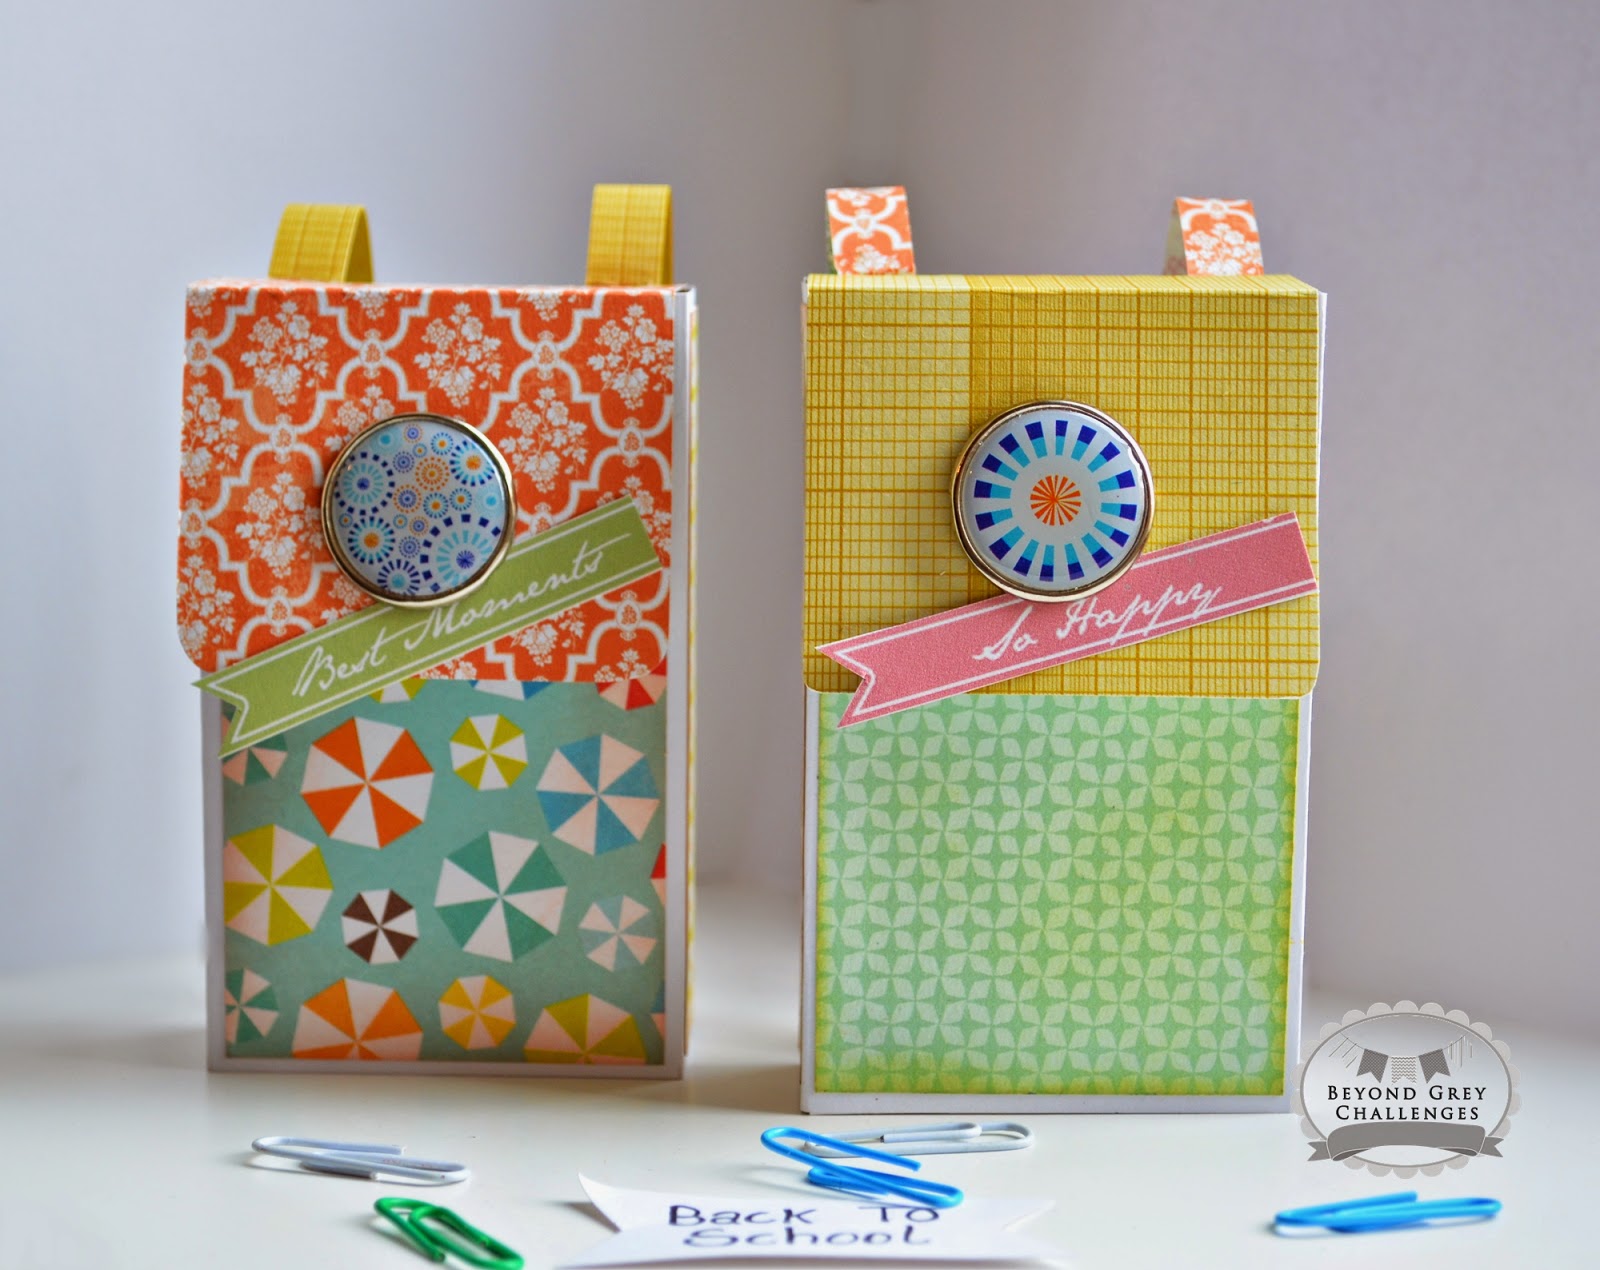
I wanted to go with the theme "Back To School " 
So i thought of making these treat boxes to hold candy for kids ! 

Here is how i made them. 

  •  Start with an A4 card stock. Keep it on your scoring tool like its shown in the above picture.
  • Score at 1" , 3.5", 4.5" , 7" and cut at 7 & 1/4th . I have scored the 7 & 1/4th line to show better where to cut. you can just use a pencil to mark that line and trim it.
  • Once you are done with the above step you will have a big piece of paper with 4 score lines. 
  • Cut this paper in half horizontally so you should have 2 final pieces as shown below.


  •  These two pieces will become one box each. 


  •  Fold on all the scored lines with your bone folder.


  •  Once one your boxes should look something like they are in the above pictures.


  •  Before you stick the box make sure you decorate it. So any pattern paper that needs to be stuck or any dry or heat embossing that you need to do , is to be done now. 
  • I decided to go with some fun and colourful papers from Echo park - Splash. 


  •  Once you have stuck your papers , take another piece of the dimensions as given above. score and cut for making the base of your box. This can be included in the first step itself by modifying the template of the box but that would have wasted a lot of my paper so, i prefer to do it this way.


  •  At this stage you should have 2 pieces like this. 
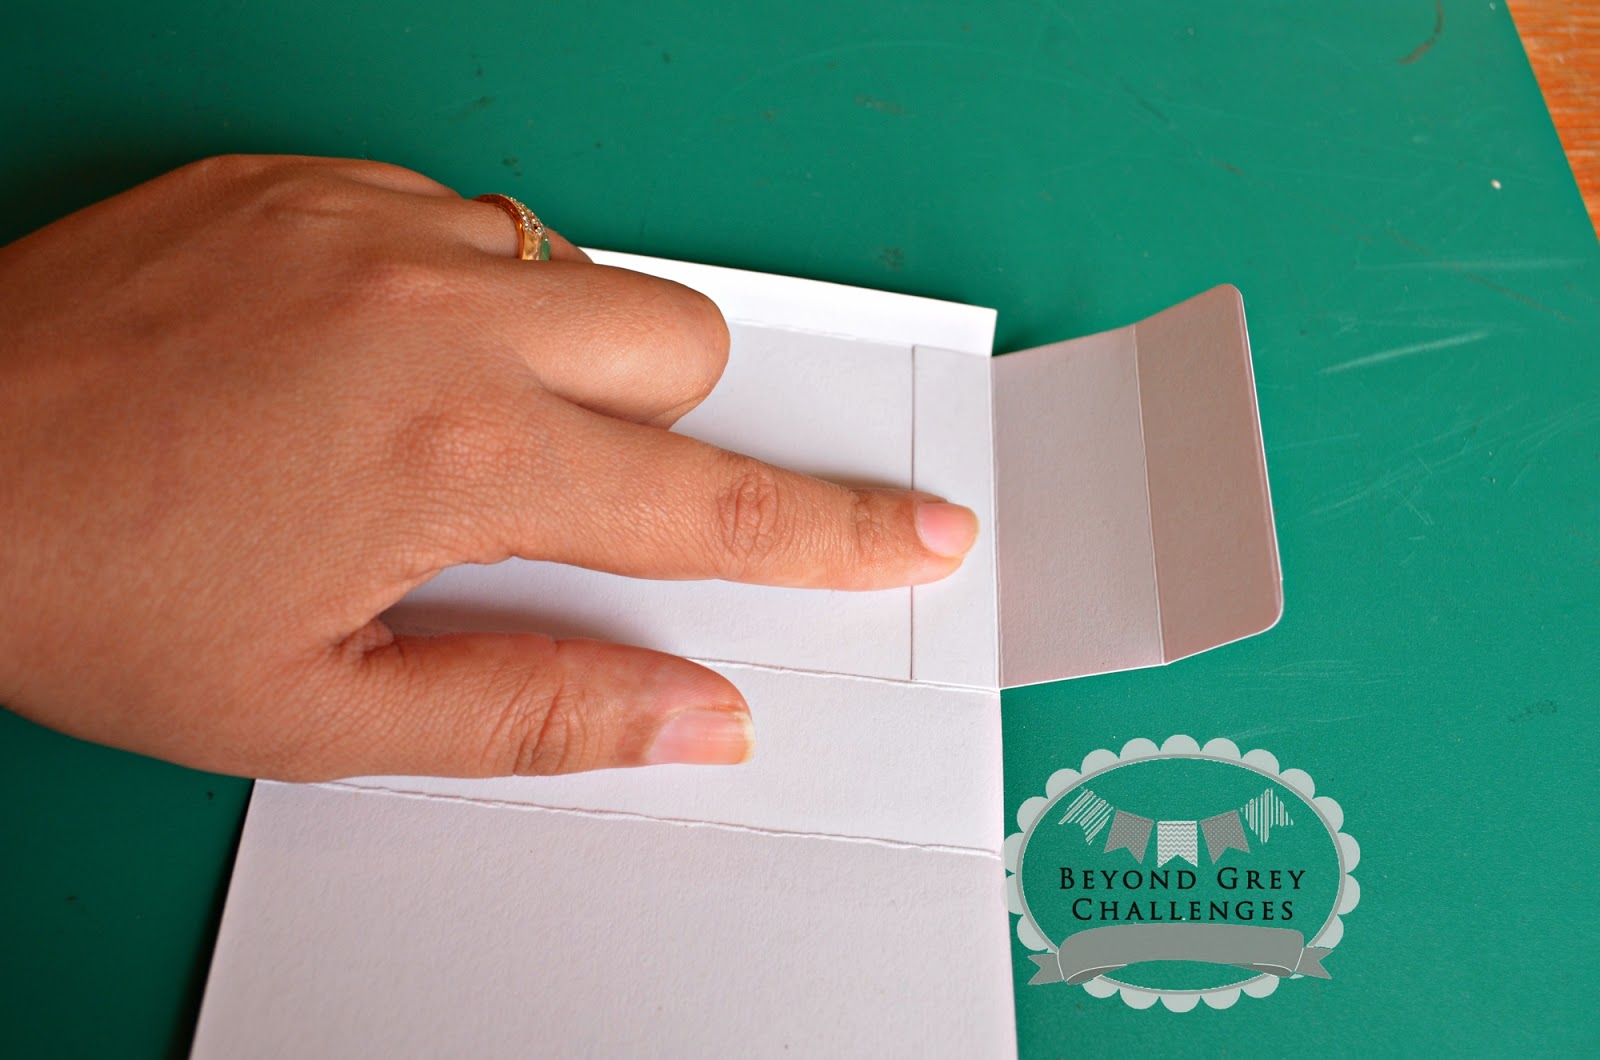

  •  Now comes the fun part ! putting it all together. 
  • REMEMBER to glue the 0.5" part of the flap and stick it on the inside of the box at the very end where we have very small scored panel. see the above picture to understand better. 

  •  Now turn over your box to the right side and glue up the small panel in white. 
  • This will give your box the rectangular frame.

  • This is how it should look at this stage.


  •  Now just glue over the bottom flap as shown above and secure the bottom of your box shut. 
  • You can keep this not glued so your box can be opened from both sides. But i wanted to fill it with some heavy candy and i didn't want to box to open up from the bottom .


  •  So that is how my box looks now after the bottom is sealed shut. 

  • Finally just glue 2 thin pieces of design paper to the back of the back pack so this will be the straps for the bag. 
  • Also cut a piece of design paper that is 6.75" long and about 2.5" wide. 
  • Score this paper at 5" & 6" as shown above . 
  • Now glue the right side of the pattern paper on the smallest panel and stick it to the inside of the box such that it should make a nice top flap as shown in the final pictures. 
  • Notice the top flaps below. 

  •  And finally embellish the top of your box any way you like. 
  • I added a big epoxy brad on the upper flap for the box and then added my sentiment banners. 

This is how the back should look. 

Hope that you liked my tutorial on Back pack boxes . 
Do let me know how u liked it (or not !) 
So i am concluding this in hopes that you will make something Kidsy ! 
for our latest challenge !
Link ur entries HERE

Thanks !! 


Thursday, February 27, 2014

Caged love !!

Hello bloggers,how you have been doing?
As,we are towards the end of our Feb 2nd half Challenge and just a day more to go...
Fabulous creations all around! I’m sure I’m not the only one who feels inspired by the previous DTs posts to go make some lovey dovey creation for loved ones.
My-oh-my did we receive a lot of great submissions for this latest challenge which is to make a craftpiece ~

with 'Love' word in it
&
without any 'red' or 'pink'

You creative bunch never cease to amaze me. Thanks as always for playing along, it makes our day posting this fortnight!

And to trigger the creative minds of other crafters who are in a dilemma to join the challenge,I am here with a Super-jumbo post (a V-day treat gift) to tempt you !

(P.S : Picture heavy post)


Well,since it must be a "NO PINK AND RED" ,I wasn't left with much alternatives and hence selected shades of purple,dark violate,white,black,brown ..


The cage has been painted and coated with mod podge,decorated with an assortment of fabric and prima roses,feathery love bird,with distressed tags and some ferns to multiply its beauty. A pretty handmade notebook and love note jar added on, and a few strokes of gesso here and there,finally made it a perfect V- gift (even without any red or pink :D) ! What do you think?

Please leave your queries, if any, join in our fun challenge !

Also, check out the wonderful submissions by the BGC DT in the one of a kind DT specific challenge hosted by our dear PJ...where you will be our judges and it ends in a day, Sounds fun..right?

Saturday, December 14, 2013

What's Up Crafty? Say-it-in-Masculine-Style!

Hello dear Crafters,
Its me (Bipasha) with you,presenting an interesting tutorial.
The other morning as I was sipping my morning coffee,a thought hit my mind why is it hard to think of ideas for masculine cards? Or may be the case is with me!! There are so many ruless: NO BRIGHT FLOWERS(the most irritating one for me :P)!! Lots of paper ripping, lots of metal and twine. Keep the colours muted and simple… browns, blues, greys etc.Masculine cards are always so
difficult for me to create, not always sure just how much to add to the layout! However recently I made something musculine,and quite unbelievingly I liked it the way it came out....so thought of sharing with u guys as a tute !

 (A detailed picture loaded post...so sit back munching your favourite snack and read it along ;))

(CLICK ON THE PICS TO ENLARGE)

Step 1:
We will divide the project in two parts:

Cut out the pieces from the medium weight chipboard of the following measurements:

Step 2:
(Main box component)
a)2-Main side pieces 2-3/8 x 3-5/8
b)Spine piece 1-3/8 x 3-5/8
c)Bottom piece 1-3/8 x 2-3/8

Using the Kraft card stock, apply tape, glue to the back side of the bottom piece and subsequent pieces of the precut chipboard pieces.


Leaving a 1/8 inch gap between all pieces, place your spine piece right above the bottom piece. Add the two Main Side pieces to each side of the spine piece making sure to leave a 1/8 inch gap.


Draw a 1/2" line around all sides of the adhered chipboard pieces. Using scissors or a craft knife, Cut on the lines creating a border that will be the tabs used to make the box.


Slowly bend the pieces into a box shape. Next, pull the tape from one side of the 1-3/8" piece, align the two sides together former a corner and adhere the tab to the side piece. Repeat for right side.


Step 3:
(Top Lid Component)
d)Top side pieces 2-1/2 x 1-3/8
e)Top piece 1-3/8 x 2-1/2
f)Front piece 1-3/8 x 1-3/8
g)Back piece 1-3/8 x 1-3/8

We will basically repeat step two for the lid, using the remaining chipboard pieces, Gluing them in place, leaving 1/8 gap, cutting out a 1/2" border, applying the structure strips for strength, cutting into the corners, mitering the border corners, apply score tape and adhering the lid together.
The lid should be 1/8" larger to slip over the end of the main box.

Step 4:
Matting your box
Paint or ink all edges and interior if desired.
Next, from patterned paper(I used Kaisercraft PPs) measure and cut out all of your exterior mats pieces and adhere to all sides using glue,or Scor-Tape.

Insert some memory tags(customise it with memory keeper elements...in any elegant way-sky is the limit!).Fill the pages with pictures and the tags with written memories....

Finally,the overall look:


Hope you enjoy making this smart masculine memory keepsake tag storage!Happy crafting :)
Would love to read your comments and answer your queries if any !

Sionara,
Bips.

Popular Posts